By Richard Smith | July 21, 2018
When I started writing functional specifications as a business analyst in 1997, I quickly realised that writing large blocks of unstructured English prose was inherently unsuitable for requirements definitions for a variety of reasons. Ambiguity, vagueness, omission and duplication were just some of the seemingly unavoidable problems with writing in natural language.
Why use Template Statements?
I developed my own techniques and style as I worked on different projects, attempting to address these problems and others. I documented some of these techniques in the Cookbook section of my company website, including how to write atomic, concise and testable statements.
Many years later, I created Needs & Means to help others learn and apply many of the best practise techniques I have learnt and used in my own career. Early on, I added a set of pre-defined Planguage scale definitions as an initial attempt to provide valuable content alongside functionality.
The new template statements feature extends these initial ideas by now allowing users to identify and create their own-re-usable content and share it with other projects in their Needs & Means organisation. It also provides a mechanism to share best-practise examples of well-written requirements to all Needs & Means users.

Re-using existing well-written requirement text can really help improve the general quality of your requirements, above and beyond the benefits you get from using Planguage and Needs & Means, for example:
Adopt a consistent syntax or structure for function - type requirements, to improve the conciseness and clarity of the text (e.g. the EARS “Easy Approach to Requirements Syntax” sentence structures of Mavin et al)
Re-use well-written Planguage scale definitions in other projects in your Needs & Means organisation
Create a re-usable library of Planguage Meter specifications
Specify Test parameters using Gherkin Given / When / Then syntax templates
Share common descriptions or links to specification sources
Needs & Means allows you to:
Create your own re-usable templates from existing scale definitions, descriptive text or “source” text within each project
Make project-level templates available for re-use across all projects in your Needs & Means Organisation (in your Organisation Library)
Use a library of best-practise scale and requirement templates curated and provided by Needs & Means from Tom Gilb and others.
Add additional usage notes, sources and comments to each template statement record
Inserting Template Statements into Specification Parameters
There are two simple methods to insert existing template statements into specification text.
The specification sidebar
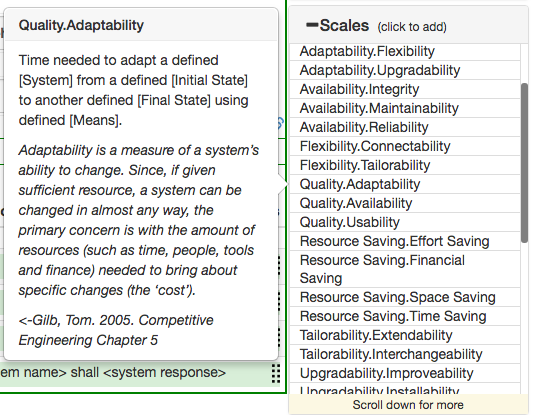
The specification sidebar provides 3 panels to select 3 different types of templates: scales, description text and sources. Each of the 3 lists are divided in to project, organisation and Needs & Means - level templates. Hover your mouse pointer over each entry to see a summary. Click an entry to see full details before finally deciding whether to insert the template into the currently selected requirement parameter.
The WYSIWYG editing toolbar
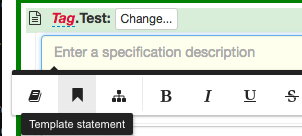
Press Ctrl + e (or ⌘ + e on Mac) within a WYSIWYG text field within a specification parameter to open the editing toolbar. Click the template statements button (“bookmark” icon, see screenshot above) to see the same list of available templates (depending on which field you are editing). Again, hover your mouse pointer over each entry to see a summary. Click an entry to insert the template text at the current cursor position in the text field.
Creating new Template Statements
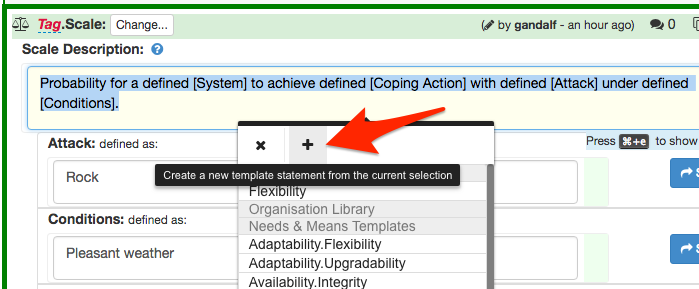
The easiest way to create your own re-usable template is to click and select the text in a WYSIWYG field whilst the specification is locked by you for editing. Click the template statements button in the editing toolbar, then click the “+” button on the popup (see screenshot above).
The Create Template Statement dialog window opens up, letting you assign a unique Tag name to the new template, and additional usage notes and source information if needed:
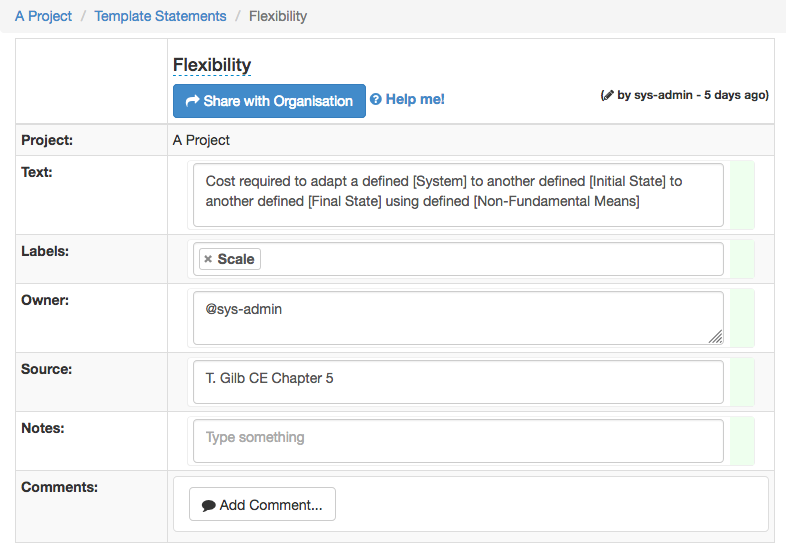
Click the Create button to create the new template.
Review list of project - level Template Statements
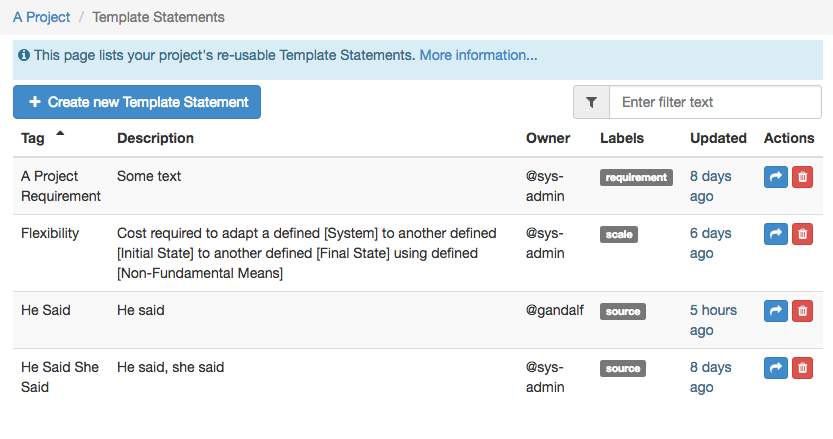
Open the More… pulldown menu in the header bar, then click the Template Statements entry to open the Template Statement List page.
From here, you can review and edit individual templates by clicking on each entry, share with other projects or delete them.